Electric bike conversion: the complete UK guide
How to convert a bicycle to electric assistance, assess compatibility, choose a motor and battery, budget for fitting and keep the finished bike safe and legal.
Start here
- Conversion makes most sense when you already own a sound bicycle that fits you and has a useful remaining life.
- Choose the complete system around the bicycle, route and local support, rather than the largest advertised wattage.
- Check the full fitted price, including battery, charger, repairs, brackets, labour and any replacement wheel or drivetrain parts.
- The finished bicycle, not just the kit’s marketing description, must satisfy the rules for where you will ride.
What does an electric bike conversion involve?
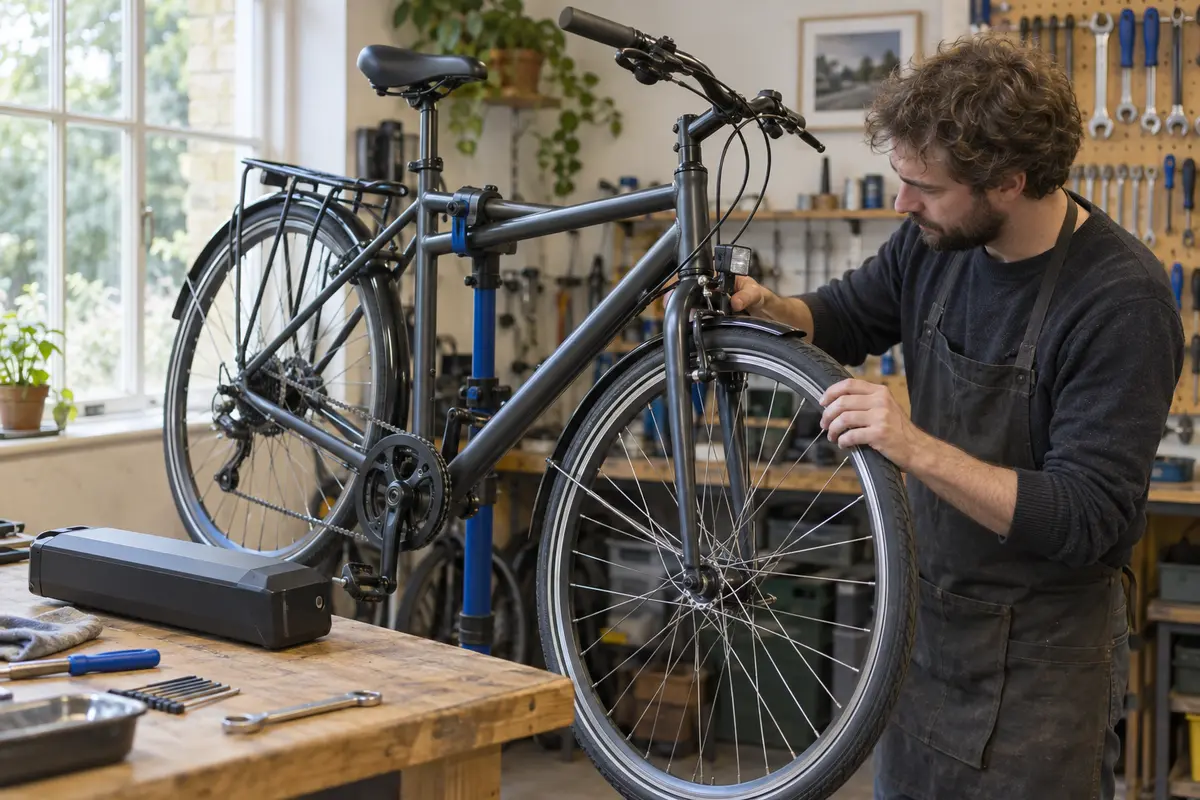
An electric bike conversion adds a motor, a rechargeable battery and the controls needed to assist your pedalling. Depending on the design, it replaces a wheel, changes the crank and bottom-bracket assembly, or drives the tyre through a roller. You normally keep the frame, riding position and much of the bicycle’s equipment.
The motor is only one part of the job. A controller regulates its electrical supply; a pedal or torque sensor determines when assistance is requested; a display or button lets you choose support; and a wiring harness connects the parts. The battery requires a secure mounting arrangement, an appropriate charger and a practical way to remove or charge it.
Some kits contain these items as a matched package. Others are motor-only listings, with the battery, wheel build, charger, display or sensors sold separately. Compare the contents before comparing prices. A cheap motor listing and a complete installed system are different purchases.
The result can preserve a bicycle you enjoy while making hills, headwinds and loaded commutes more manageable. It also introduces extra mass, electrical maintenance and a new set of compatibility questions. For specific systems and the situations they suit, use our best electric bike conversion kits comparison.
Is conversion worth it, or should you buy a complete e-bike?
Start with the donor bicycle. If it fits well, brakes predictably, has a healthy drivetrain and offers space for a battery, retaining it may be attractive. If it needs a fork, both wheels, brakes and transmission before the conversion starts, the apparent saving can disappear.
| Your priority | Conversion can make sense when… | A complete e-bike may be better when… |
|---|---|---|
| Fit and familiarity | You already have a comfortable, suitable bike | You also need a different frame size or riding position |
| Budget | The donor is sound and the complete fitted quote is competitive | Repairs and fitting take the conversion close to a supported complete bike |
| Lifting and storage | You have checked the actual added weight and battery removal | An integrated light or compact model solves a storage problem more cleanly |
| Ownership support | One installer will support both mechanical and electrical work | You want one dealer responsible for the complete machine |
| Specialist use | The manufacturer approves your exact bike and loading | You need a certified cargo, adapted or demanding off-road application |
A complete e-bike usually offers a cleaner integration of motor, battery and cabling. That does not make it automatically more repairable: proprietary batteries and electronics can still be expensive. Conversely, a conversion using familiar bicycle parts can be straightforward to maintain mechanically while relying on a particular supplier for its electrical system.
Ask about the effect on the donor bike’s warranty before purchasing. Do not assume the frame manufacturer will cover damage associated with an added motor. For the alternative route, compare our electric bike buying guide, Tenways range and UTO folding and compact bikes.
Front hub, rear hub, mid-drive or friction drive?
| Arrangement | Main attraction | Main limitation | Check first |
|---|---|---|---|
| Front hub | Keeps the existing rear transmission; often a relatively simple wheel swap | Changes steering-wheel weight and places motor torque into the fork | Fork approval, dropout and axle dimensions, wheel and brake compatibility |
| Rear hub | Assistance at the rear wheel with a familiar front end | More complicated rear-wheel removal and transmission matching | Rear spacing, cassette or freewheel, brake rotor and tyre clearance |
| Mid-drive | Uses the bicycle’s gears to keep the motor working efficiently on climbs | More installation work and additional chain and sprocket load | Bottom-bracket dimensions, frame clearance, chainline and gearing |
| Friction drive | Can retain both wheels and much of the drivetrain | Tyre contact, weather, clearance and surface condition affect suitability | Approved tyres, mounting space, wet-weather guidance and system limits |
A rear or front hub motor does not gain mechanical advantage from changing the bicycle’s gears in the same way a mid-drive does. Your gears still help your legs, but the hub motor’s relationship to wheel speed remains fixed. On a slow, steep climb, the right motor winding, wheel size and operating limits matter more than a headline torque figure.
A mid-drive can exploit a low gear, but requires sensible shifting. Ease pedal pressure when changing gear and avoid asking the system to pull a high gear from a near standstill. A torque sensor can make assistance more responsive to effort; a cadence sensor can give strong support with light pedalling. Neither label guarantees good calibration.
Do not rank hub-motor and crank-motor torque numbers as if they were measured at the same point. The drivetrain and wheel diameter alter the force at the road. Ask how the system handles your actual gradient, rider and luggage load instead.
The compatibility checks to make before ordering
Wheels, axles and brakes
Record the tyre’s ETRTO size as well as its familiar inch or 700C label. Check axle type and diameter, the distance between dropouts, and whether the kit supports that exact arrangement. Quick-release and through-axle systems are not interchangeable merely because the wheel diameter matches.
For rim brakes, the replacement rim must provide the correct braking surface and position. For disc brakes, check the rotor fitting, rotor size, calliper clearance and the supplier’s adapter instructions. A kit may leave less clearance around a calliper or require a different rotor. Existing braking performance must suit the finished bicycle’s weight and use.
Frame, fork and torque reaction
A hub motor applies reaction torque at the axle. The frame or fork, axle washers and any specified torque arm must handle it correctly. Grin’s torque-arm guidance explains why preventing axle rotation matters. A torque arm is not permission to use an otherwise unsuitable fork.
Obtain explicit compatibility guidance for carbon, suspension and lightweight forks. Do not file dropouts, spread a frame, drill structural parts or improvise battery mounts to make a kit fit. If the proposed installation needs that kind of alteration, stop and ask the bicycle manufacturer and kit supplier for an approved solution.
Battery, controls and movement
Use a battery template or the maker’s dimensions to check space. You need room to insert and remove the pack, turn the bars, move the suspension and use the bottle cage or lock. Consider the load rating and attachment points of a rack-mounted battery, and the extra steering mass of a handlebar-mounted pack.
Confirm sensor clearance at the cranks, display space, brake-lever compatibility and cable length. On a folding bicycle, check the entire fold with the system fitted. Cables must remain clear of moving parts without becoming taut when the bars turn.
Rear transmission and bottom bracket
A cassette body and a threaded freewheel take different sprocket assemblies. Count the speeds, identify the fitting and check chainline rather than relying on “fits Shimano” in a listing. For a mid-drive, identify the bottom-bracket shell width, diameter and thread or press-fit standard before buying.
Finish with the whole-bicycle load limit. Add rider, luggage, accessories and the conversion system. A stronger motor does not increase a frame’s permitted load or make an ordinary bicycle suitable for carrying a passenger.
UK conversion rules: the finished bicycle is what matters
For Great Britain, the official EAPC requirements include usable pedals, a motor with a maximum continuous rated output of 250W, and assistance that cuts off at 15.5mph. Riders must be at least 14. A qualifying EAPC does not need motor-vehicle registration, tax, a driving licence or compulsory motor insurance. Check the current GOV.UK rules for the full requirements, including markings.
A 250W label is not a complete legal assessment. Nor is a display setting that limits a differently rated motor. Ask for the rating and conformity information for the supplied motor, controller and completed configuration.
Throttles require particular care. Walk assistance is different from a throttle that propels a rider without pedalling. New “twist and go” EAPCs can require vehicle approval. A selectable faster “off-road” mode also causes problems even if you intend to keep it switched off on public roads. The DfT and DVSA standards guidance explains these distinctions.
Do not treat “off road” as meaning any bridleway, public trail or cycle path. A machine outside EAPC rules is not an ordinary bicycle in law. Our e-bike legal checker helps identify questions to resolve; consult the applicable official guidance for the nation and route where you will ride.
Battery capacity, range and the difference between volts and watt-hours
Battery energy is normally compared in watt-hours: nominal volts multiplied by amp-hours. A nominal 36V, 10Ah pack contains about 360Wh; a 36V, 15Ah pack about 540Wh. Amp-hours alone cannot fairly compare packs at different voltages.
Voltage is also a compatibility requirement. A larger or higher-voltage battery is not a universal upgrade. The controller, motor system, charger, connectors and battery management must be approved to work together. Similar-looking plugs do not establish compatibility.
For planning, divide available watt-hours by an assumed energy use per kilometre. The following is arithmetic, not a tested range claim. Actual consumption changes with hills, speed, support level, weight, temperature, stops and tyre pressure.
| Assumption | Energy allowed for riding | Calculated distance |
|---|---|---|
| 10Wh per kilometre, no reserve | 400Wh | 40km / about 25 miles |
| 15Wh per kilometre, no reserve | 400Wh | About 27km / 17 miles |
| 10Wh per kilometre, 20% reserve | 320Wh | 32km / about 20 miles |
| 15Wh per kilometre, 20% reserve | 320Wh | About 21km / 13 miles |
A reserve helps cover an unexpected diversion or headwind but cannot guarantee the return trip. For a demanding commute, ask for a demonstration on similar terrain. Compare manufacturers’ claimed ranges only when you understand the test conditions and whether the quoted distance assumes substantial rider effort.
A bigger battery can reduce charging frequency, but adds cost and weight. A small removable pack may be a better compromise for short trips and stairs. Replacement availability, service support and a safe charging location are as important as initial capacity.
Build a complete conversion budget
Ask for an itemised price that includes the battery and charger, delivery, fitting, wheel work, sensors, required brackets and initial mechanical repairs. If importing, establish who handles taxes, returns, warranty shipping and conformity responsibilities before paying.
| Item | Example allowance | What to establish |
|---|---|---|
| Complete kit with battery and charger | £650 | Exactly which capacity, wheel, controls and fittings are included |
| Installation and safety handover | £150 | What labour and aftercare the installer accepts |
| Donor-bike repairs and small parts | £100 | Tyres, pads, cables or drivetrain work identified in the assessment |
| Illustrative total | £900 | Compare a written quote with the complete-bike alternative |
These figures deliberately show the budgeting method; they are not typical-price promises. Your bike may need none of the illustrated repairs, or much more work. The donor bicycle’s purchase price is additional if you do not already own it.
Charging is usually a small part of ownership cost. For example, putting 400Wh into a battery with an assumed 85% wall-to-battery efficiency would use roughly 0.47kWh. At an illustrative 30p/kWh tariff, that is about 14p. Use your own electricity price; neither the tariff nor efficiency is a prediction.
Budget separately for consumables, a future replacement battery, security and insurance if wanted. A difficult-to-source battery can undermine a cheap initial purchase. Ask the insurer to confirm cover for a converted bicycle, its declared value and the supplied system.
What fitting and a proper handover should cover
This is a project sequence, not a substitute for the chosen kit’s installation manual. Different axle washers, torque arms, sensors and fixing arrangements require different procedures and torque values.
- Assess the donor: resolve frame, fork, wheel, brake and drivetrain faults before adding assistance.
- Confirm the package: record the exact motor, battery, wheel, charger and compatibility confirmation.
- Install mechanically: follow the bicycle and kit instructions for wheel or motor installation, fasteners, torque reaction and battery support.
- Route and connect: keep the battery disconnected while working, follow the harness instructions and protect cables from steering movement, tyres, chain and sharp edges.
- Configure the supplied system: use the correct wheel setting and approved assistance configuration. Do not unlock speed or power restrictions.
- Check operation safely: verify braking, secure wheel retention, pedal-sensor behaviour, assistance cut-off and any supplied brake cut-offs before normal riding.
- Document the handover: obtain manuals, serial numbers, charger details, warranty contacts and the supplier’s first-check schedule.
Start with low assistance in a clear, controlled area. An unfamiliar cadence sensor can continue support briefly after a change in pedalling; learn the system’s behaviour before entering traffic. Recheck fittings as directed by the maker, rather than inventing a universal mileage interval.
Ask a local bicycle workshop whether it supports the exact system before ordering. Some workshops service the bicycle but will not install or diagnose third-party electrics. Agree responsibility for both parts of the finished machine.
Battery safety, charging and storage
Buy a complete, traceable battery and its manufacturer-approved charger. Do not rebuild a pack, mix loose cells or use a charger simply because its plug fits. A pack damaged by a crash, water ingress or overheating needs assessment by the supplier, not a trial charge.
Follow the government’s e-cycle battery safety guidance: keep charging clear of escape routes and combustible material, remain able to notice a problem, and avoid charging while asleep or away. Do not cover the battery or charger. Follow the pack’s specified temperature and storage instructions.
Stop using a battery that becomes unusually hot, swollen, damaged, leaking, noisy or gives off an unusual smell. If it smokes or catches fire, move away, evacuate and call 999. Do not attempt to tackle a developing battery fire yourself.
Plan the charging location before choosing a pack. A removable battery can help when the bicycle lives in a shed, but workplaces, landlords and transport operators may set their own restrictions. Keep the battery secure in transit and use an appropriate battery-recycling route at end of life.
Living with the converted bicycle
Routine bicycle checks still matter: tyre pressure, brake wear, chain condition, loose fasteners and wheel security. The conversion adds cable inspection, battery-latch checks and attention to the motor axle and spokes. A wheel that develops looseness or unusual noises needs attention before continued use.
Ask how to remove the motor wheel after a puncture. You may need a spanner and a defined connector sequence, while a mid-drive can leave conventional wheel removal largely unchanged. Carry tools suited to the finished bike; our puncture kit, mini-pump and multitool comparisons explain the different jobs.
Keep the invoice, installed specification and battery serial number. Save the manuals locally so you are not dependent on a disappearing product listing. Confirm the availability of a replacement charger, sensor, display and battery before committing to a system.
Conversion is most convincing when the whole project works: the bicycle fits, the system suits the route, charging is manageable, the legal configuration is documented and someone will support it. Use the kit comparison to shortlist a system, then obtain a bike-specific compatibility answer and a complete quote.
Frequently asked questions
Can any bicycle be converted to electric?
No. Wheel and axle standards, frame and fork strength, battery space, brake condition and the kit maker’s compatibility rules all matter. A kit that fits one conventional hybrid may not fit a carbon road bike, folding bike or through-axle mountain bike.
Is a 250W conversion automatically road legal?
No. The finished bicycle must also meet the pedal, assistance-speed, marking and other applicable requirements. Throttle operation can require approval. A motor advertised as 750W does not become a verified 250W motor simply because a display setting is reduced.
Can I pedal faster than 15.5mph?
Yes. The limit concerns motor assistance. A compliant bicycle can travel faster through your own pedalling or downhill, provided the motor stops assisting at the required threshold and you ride appropriately for the conditions.
How much weight does conversion add?
Add the motor, battery, controller, brackets and wiring, then subtract the parts removed. A supplier’s motor-only weight is not the added system weight. Ask for the complete fitted increase and consider how you will lift the bike through doors, stairs or onto a rack.
Can I convert a folding bike?
Sometimes. Use a kit specifically approved for the exact bike and generation. Narrow fork spacing, small-wheel gearing, cable movement and the folded package need special attention. A battery or bracket must not interfere with the folding mechanism.
Should I fit the kit myself?
Only if the supplier supports DIY fitting and you can carry out the required bicycle work correctly. An experienced installer is the better choice for uncertain compatibility, specialist wheel work, bottom-bracket work or unresolved electrical and braking questions.
Can I carry on riding if the battery runs flat?
A conventional pedal-assist conversion remains pedalable, but extra weight and system drag can make the return journey harder. Check how the chosen system behaves without assistance and retain suitable low gears.
Sources and product information
Read the original specifications, instructions and official guidance. Availability, bundles and product details can change.
- GOV.UK: riding an electric bike
- Department for Transport and DVSA: EAPC standards and legal requirements
- Office for Product Safety and Standards: battery safety for e-cycle users
- Swytch: conversion systems and installation resources
- Cytronex: complete conversion systems
- Grin Technologies: torque-arm engineering